Invoicing connections
Connect the provider that issues your invoices, and set it up.
Before you start
- Where: Settings → Integrations → Platform Integrations (
https://platform.vivin.app/settings/integrations). - Plan: every account can connect a provider. Invoicing starts when you connect one; there is no separate switch.
- Permissions: Account Settings → Module, Account Settings → Integrations and Utilities → Edit Connections. Configure on VIVIN Invoicing also needs Account Settings → Invoicing & Payments. Super Admin and Admin have all of them by default.
Add and remove connections as described in Integrations. Then set the tax codes in Invoicing.
Which providers can run together
| Provider | Runs with others? | More than one? |
|---|---|---|
| Invoice Express, Hostkit, Sage50c | No. While one is connected you cannot add another. | No |
| VIVIN Invoicing, NetSuite, A-Cube (Italian e-invoicing) | Yes, with each other. | Yes |
With VIVIN Invoicing, NetSuite and A-Cube:
- The first connection is the catch-all. It has no filters and issues everything.
- Each one you add after it is a filtered connection. Choose at least one of Payment types or Owners: charges that match go through it, and everything else falls back to the catch-all. With both set, a charge must match both.
- While a filtered connection exists, the catch-all shows a Fallback badge and cannot be removed.
- A filtered card shows its Payment types and Owners (or All). Edit on it changes them in Edit routing filters, with the same rules as when you added it; changes apply to new invoices. The catch-all has no Edit. Keep filters from overlapping: when two match the same charge, the one filtering on both type and owner wins. If they are equally specific, the invoice is not issued.
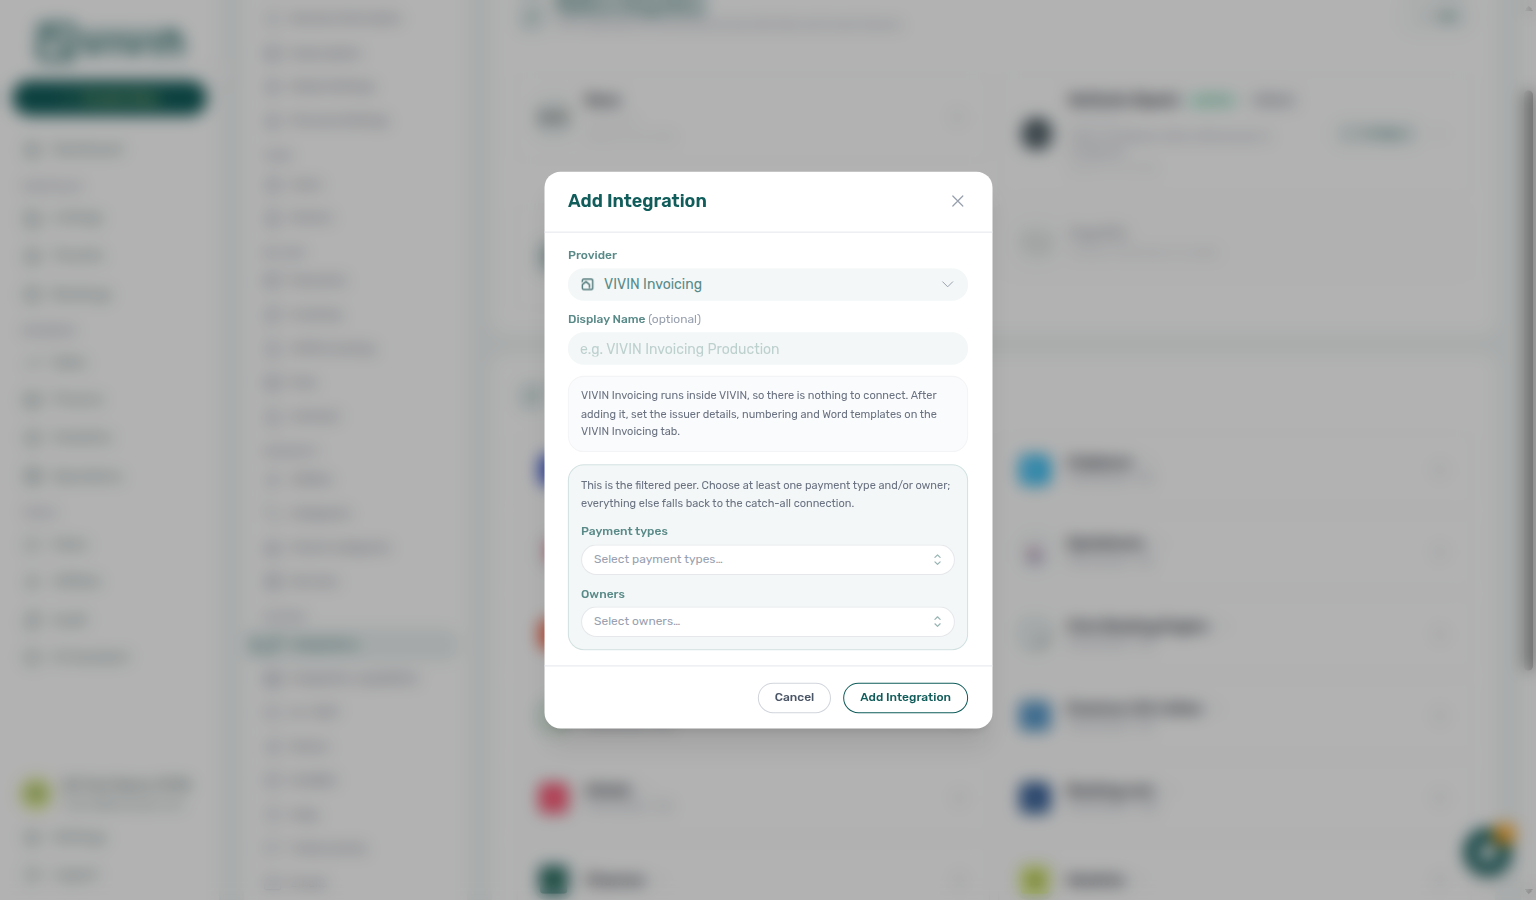
VIVIN Invoicing
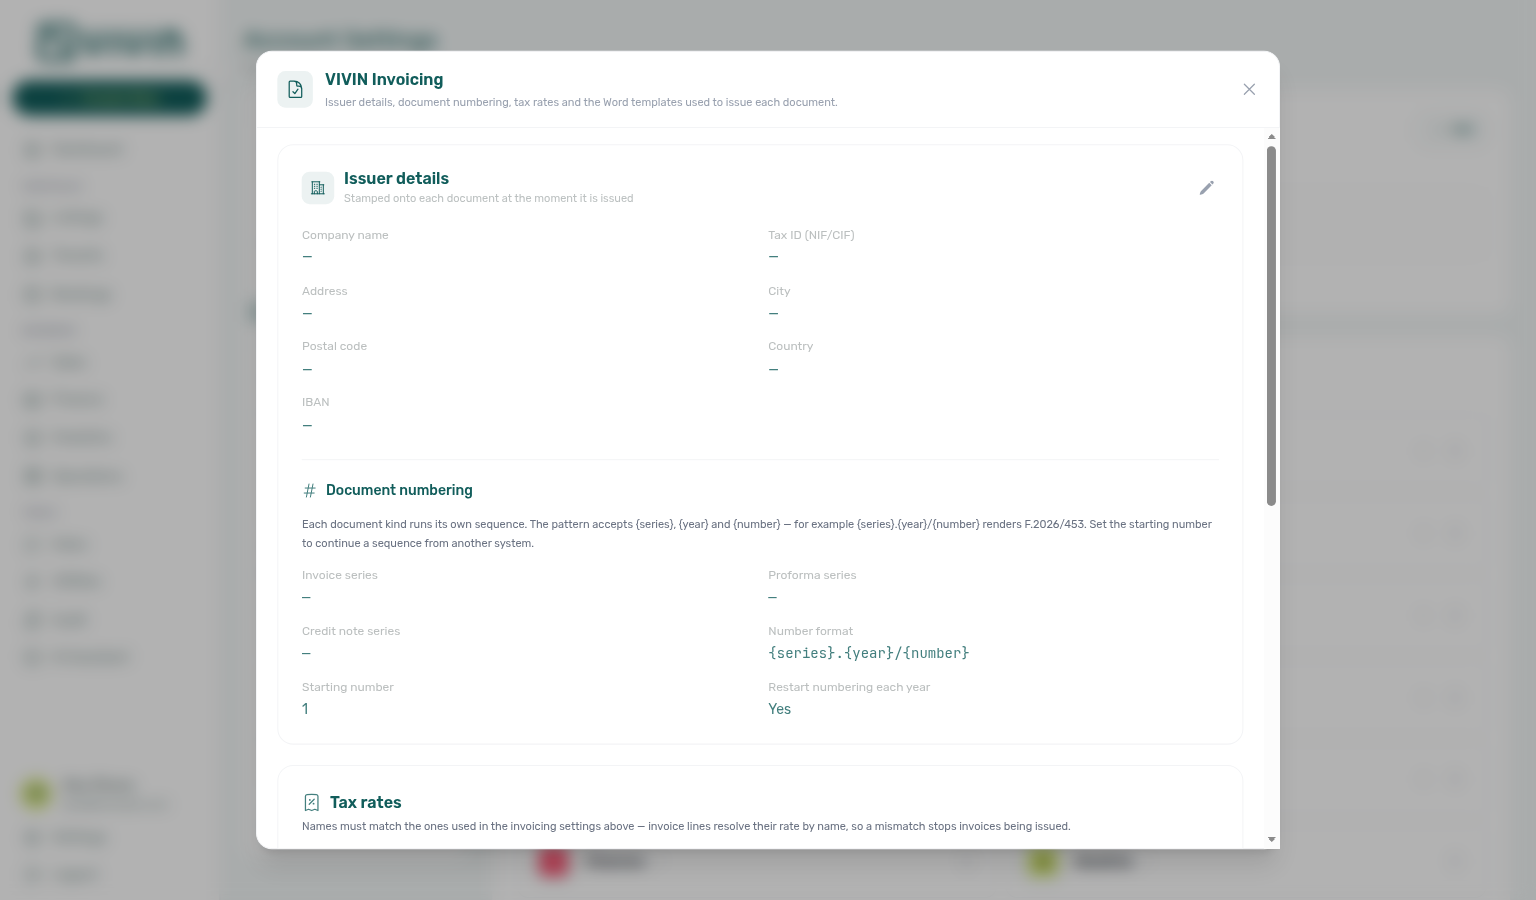
Issues invoices, proformas and credit notes from inside VIVIN, with no outside account. After you add it, click Configure on its card ("Invoice numbering, taxes and Word templates").
| Section | Fields |
|---|---|
| VIVIN connection | Which connection you edit. Shown only with more than one. |
| Issuer details | Company name, Tax ID (NIF/CIF), Address, City, Postal code, Country, IBAN |
| Document numbering | Invoice series, Proforma series, Credit note series, Number format, Starting number, Restart numbering each year |
| Tax rates | Tax name and Rate (%) for each rate; Add rate |
| Word templates | One .docx for each of Tenant invoice, Tenant proforma and Tenant credit note |
- Issuer details, numbering and templates are set per connection; tax rates apply to the whole account. Issuer details are stamped on each document when it is issued.
- Number format accepts
{series},{year},{yy}(the year in two digits),{number}and{number:4}(the number with zeros in front, to 4 digits; any width from 1 to 10 works):{series}.{year}/{number}givesF.2026/453and{series}{number:4}-{yy}givesF0453-26. Set it before you issue: once the first document is issued, the format can no longer be changed. Starting number continues a sequence from another system. - With Owner Reports on, you also get Management fee series and the Owner invoicing and Owner liquidation templates.
- Invoice lines find their rate by name, so the Tax name must match the one you pick in Tax Codes.
- Each template row has Upload, Preview, Export and Delete template. Preview fills a tenant document with two sample lines (rent and utilities, at one VAT rate) so you can check how the repeated row prints; the Owner invoicing template previews one fee line. View available variables lists the tokens:
{IssuerName}prints the company name,{DocumentNumber}the number. Put{#Items}at the start of a table row and{/Items}at the end to repeat it per invoice line. Unknown tokens print blank. A template with a broken tag, such as{ClientNamewithout its closing}or{#Items}without{/Items}, is refused on upload, with the list of tags to fix.
Hostkit
Each listing uses the API key of its own property in Hostkit, so the connection asks for no key.
- Add Hostkit. The dialog links to Hostkit's guide on creating keys (in Hostkit, Properties → API key).
- On the Hostkit card, click Listing keys.
- In Hostkit API keys by listing, search by listing or property, paste the key into New key and click Save on that row. Saved key shows "Configured (···1234)" or Not set.
- In Invoicing, set Hostkit invoice series.
A listing whose key is Not set cannot be invoiced through Hostkit.
NetSuite
- Add NetSuite with the Account ID, OAuth client ID, Certificate ID and Private key (PEM). All four are required.
- On the card (badge Active), click Configure.
- Fill in Invoice defaults and the SII identification type map, then click Save configuration.
- Under Property class mappings, pick a property in Select a property, enter its Class code and click Add. Each row saves on its own.
| Section | Fields |
|---|---|
| Invoice defaults | Subsidiary code, GL account code, Terms code, Currency (internal id), Base location code, Default payment method ID, Bank account (payments are recorded here) |
| SII identification type map | One row per customer identification type and its NetSuite SII code (Add mapping) |
| Property class mappings | One NetSuite class code per property |
- When VIVIN can read the values from NetSuite, the defaults are dropdowns ("Loading from NetSuite…" while they load). Otherwise type each code exactly as in NetSuite.
- Invoice defaults and the SII map are per connection. Property class mappings are shared by all NetSuite connections.
A-Cube (Italian e-invoicing)
- Add A-Cube (Italian e-invoicing) with your A-Cube login email, A-Cube password and Environment: Sandbox (test) or Production.
- On the card, click Italian invoicing settings and fill in the sections below.
- Click Save. The window closes when A-Cube accepts the setup; reopen it to check it shows Ready to issue.
| Section | Fields |
|---|---|
| Issuing company | Company name, Partita IVA, Codice Fiscale (if different), address, street number, CAP, city, province, Tax regime |
| Numbering | Sequence name and Number format (%s = number, %Y = year) |
| Recipients | Require an Italian Codice Fiscale on tenant invoices |
| Courtesy copy template | A .docx for Invoice (TD01) and Credit note (TD04) |
- The issuing company is printed on every invoice as the seller.
- VIVIN creates the sequence in A-Cube only if it does not exist yet; an existing sequence keeps its counter.
- With the Codice Fiscale switch on, a tenant invoice is refused until the tenant has an Italian Codice Fiscale. Companies and credit notes are not affected.
- The courtesy copy is what the tenant receives. Without a template, A-Cube's standard layout is sent.
- One A-Cube connection issues for one Italian company. For several companies, add one connection each and use Owners filters.
What happens when you save
- A connected provider issues from the next document on. Documents already issued do not change.
- New issuer details, numbering and templates apply to documents issued afterwards.
Troubleshooting
- "Select at least one payment type or owner for this filtered connection.": a second VIVIN Invoicing, NetSuite or A-Cube connection needs a filter.
- "Account ID, client ID, certificate ID and private key are all required for NetSuite.": fill in all four.
- A-Cube shows "Settings saved, but A-Cube refused the numbering or webhook setup.": your settings are kept and the window shows A-Cube's reply. Correct the numbering and save again.
- The catch-all cannot be removed: remove the filtered connections first.
Tips
- To switch from Invoice Express or Hostkit to another provider, remove the old connection first, then add the new one, and pick every Tax VAT again.
- Keep logos and signatures you do not want on every document out of Word templates. VIVIN warns you when an uploaded template contains images.
Related
- Integrations
- Invoicing: tax codes, remarks and Hostkit series
- Finance: issuing invoices
- Owners
- How integrations work